Introduction to Organizations
Learn about the hierarchical structure of organizations in Pivot, their key features, and how to manage settings, roles, and security.
Introduction to Organizations
An organization in Pivot is the administrative layer that oversees space creation, security settings, and overall configurations. It provides a management center where admins can set up memberships, user roles, and permissions.
Key Features of an Organization
- Username and Name: Each organization has a unique identifier and a name that is not unique.
- Spaces: The structured environments where members collaborate, share content, and manage projects.
- Admin page: A central area where administrators can view settings, members, and security controls.
- Admins: Members with the authority to manage organization-wide configurations and policies.
Organization Admin Roles
In Pivot, multiple members can have administrative roles within an organization. There are three levels of admin roles, each with different levels of control and permissions.
Owner
The Owner is the member who creates the organization. They have the highest level of control and can:
- Manage all organization settings, including security and access controls.
- Invite and manage members, including assigning admin roles.
- Configure subscriptions, payments, and billing.
- Create and delete spaces.
- Oversee integrations with external platforms.
- Transfer ownership to another member if needed.
Admin
An Admin has similar permissions to the Owner, except they cannot transfer ownership. Admins can:
- Create and delete spaces.
- Manage organization members, including assigning roles (Admin or Viewer) and removing members.
- Configure security settings, domain controls, and access restrictions.
- Oversee subscriptions, payments, and billing information.
- Manage integrations with external platforms.
Viewer
A Viewer has read-only access to organizational settings. They can:
- View organization details, including active members, spaces, and settings.
- See, but not modify, security settings, domain controls, and subscriptions.
Accessing the Organization Admin Page
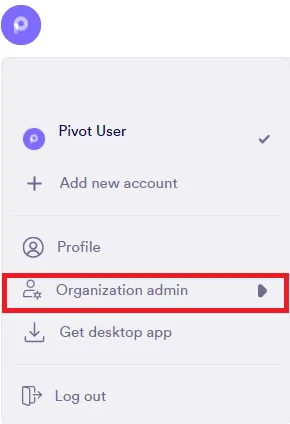
Open the sidebar menu
Click your profile picture to open the sidebar menu.

Go to Organization Admin
Click Organization admin, then select the corresponding organization.
Organization Admin Tabs
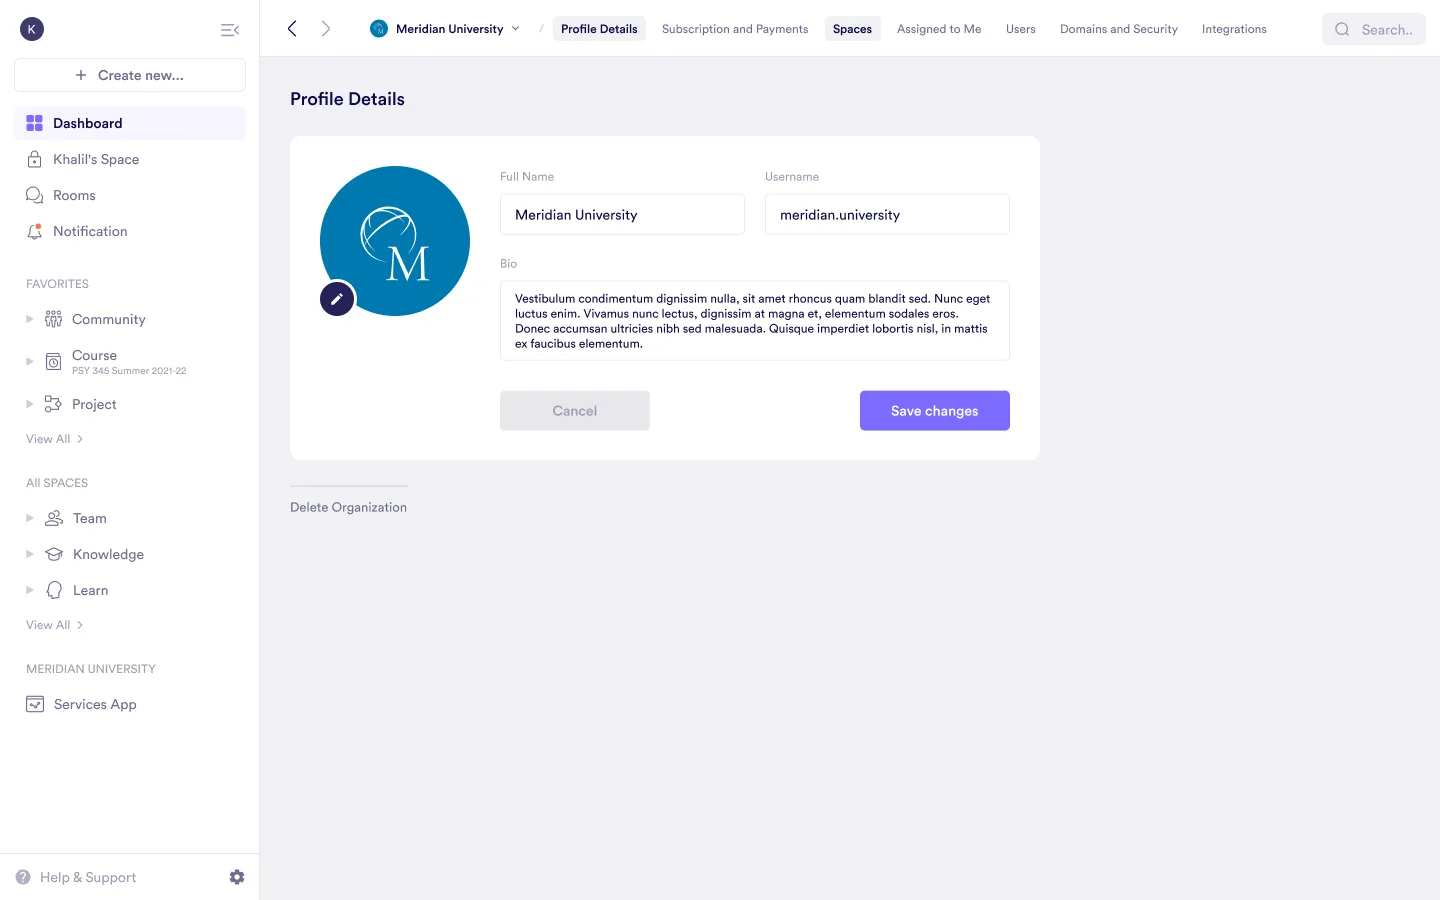
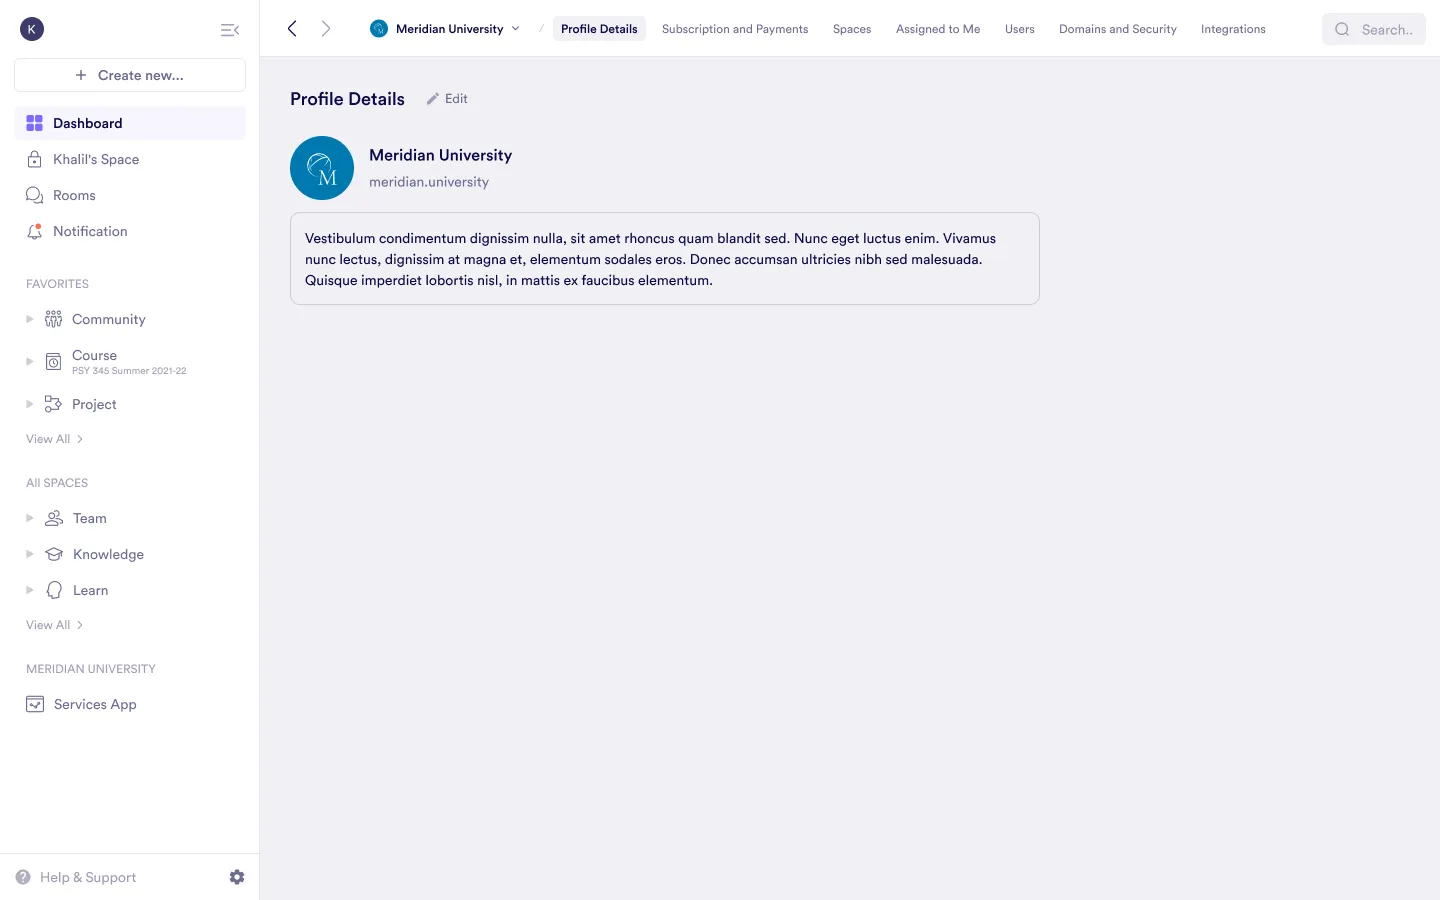
Profile
Modify the organization name, username, and bio.
Spaces
View and manage all spaces within the organization, including:
- Active spaces: Spaces currently in use.
- Deleted spaces: Spaces that were removed but may be restored if necessary.
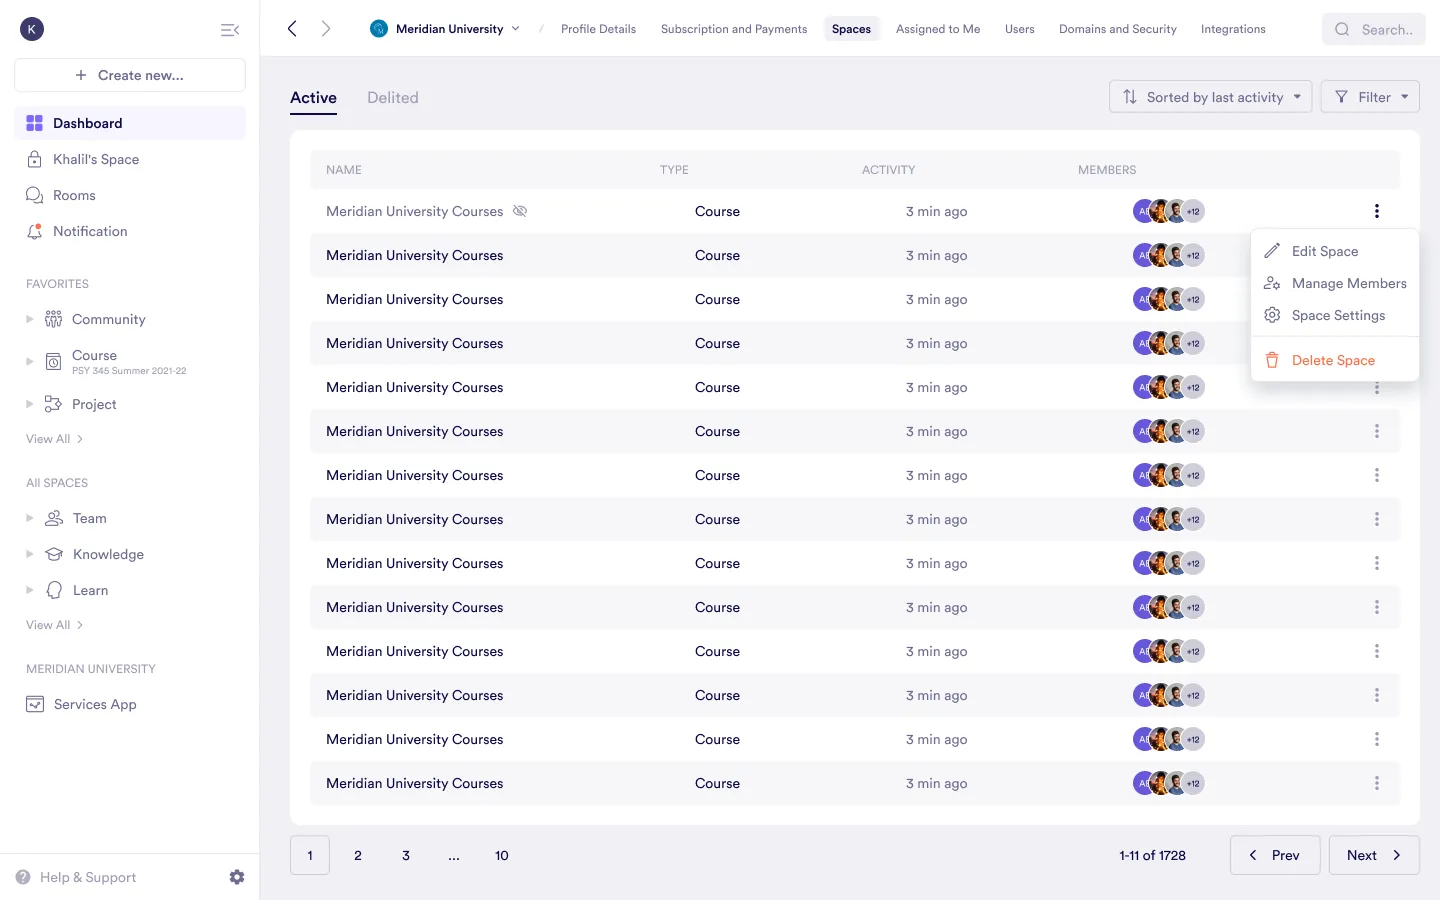
Actions:
- Edit space: Modify space settings.
- Manage members: Add or remove users.
- Space settings: Adjust permissions and visibility.
- Delete space: Permanently remove a space.
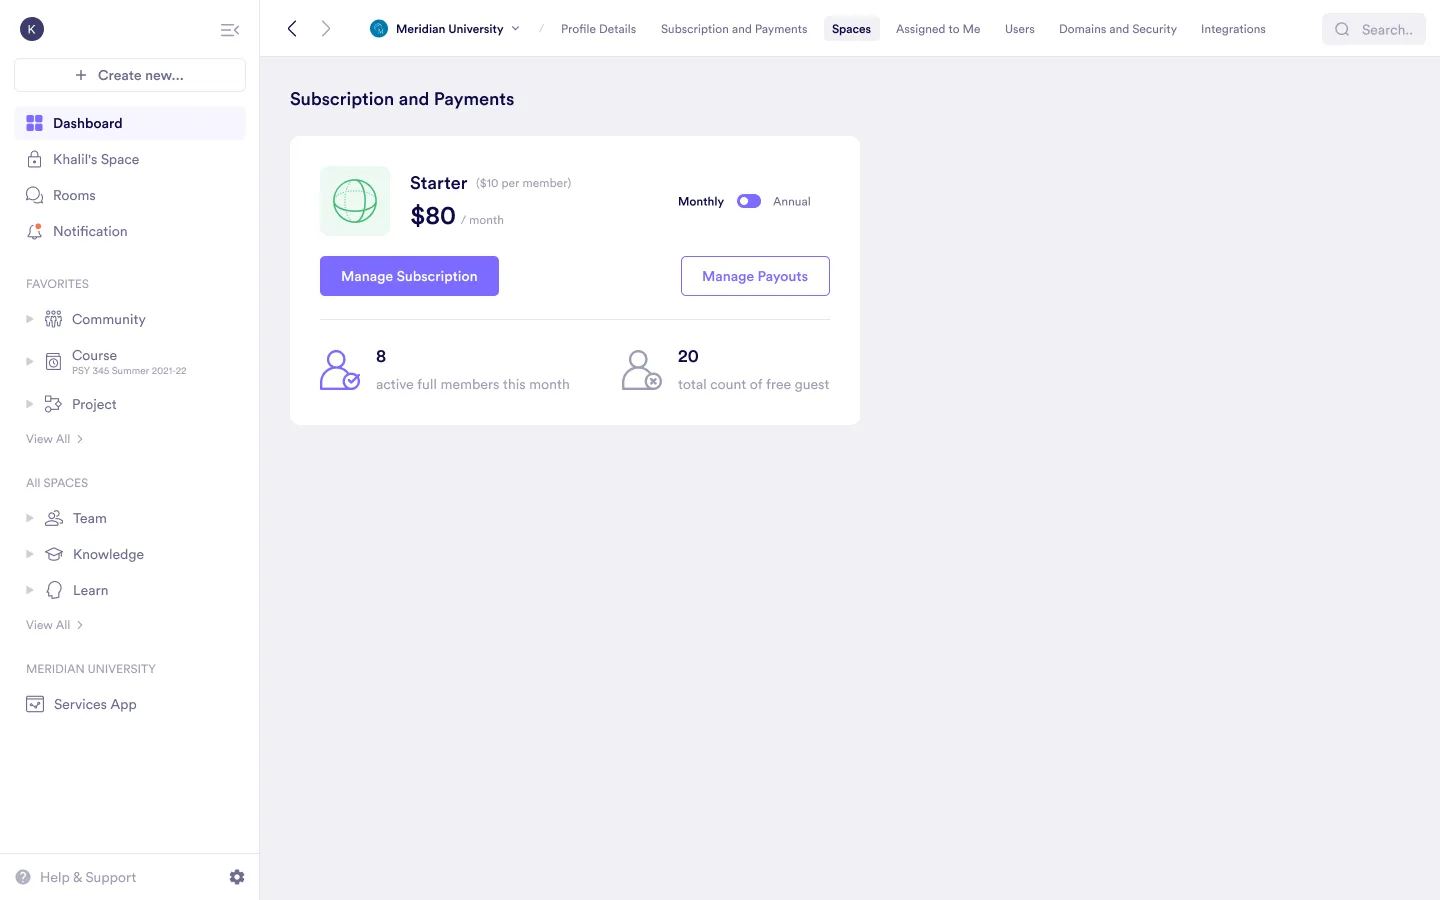
Subscriptions and Payments
Manage active subscriptions and payment settings.
View the total number of full members and guests within the organization.
Members
Admins can:
- Add new organization admins and assign them roles:
- Admin – Full access to manage settings, members, and spaces.
- Owner – Highest-level administrator, with exclusive rights such as domain management.
- Viewer – Limited access with read-only permissions.
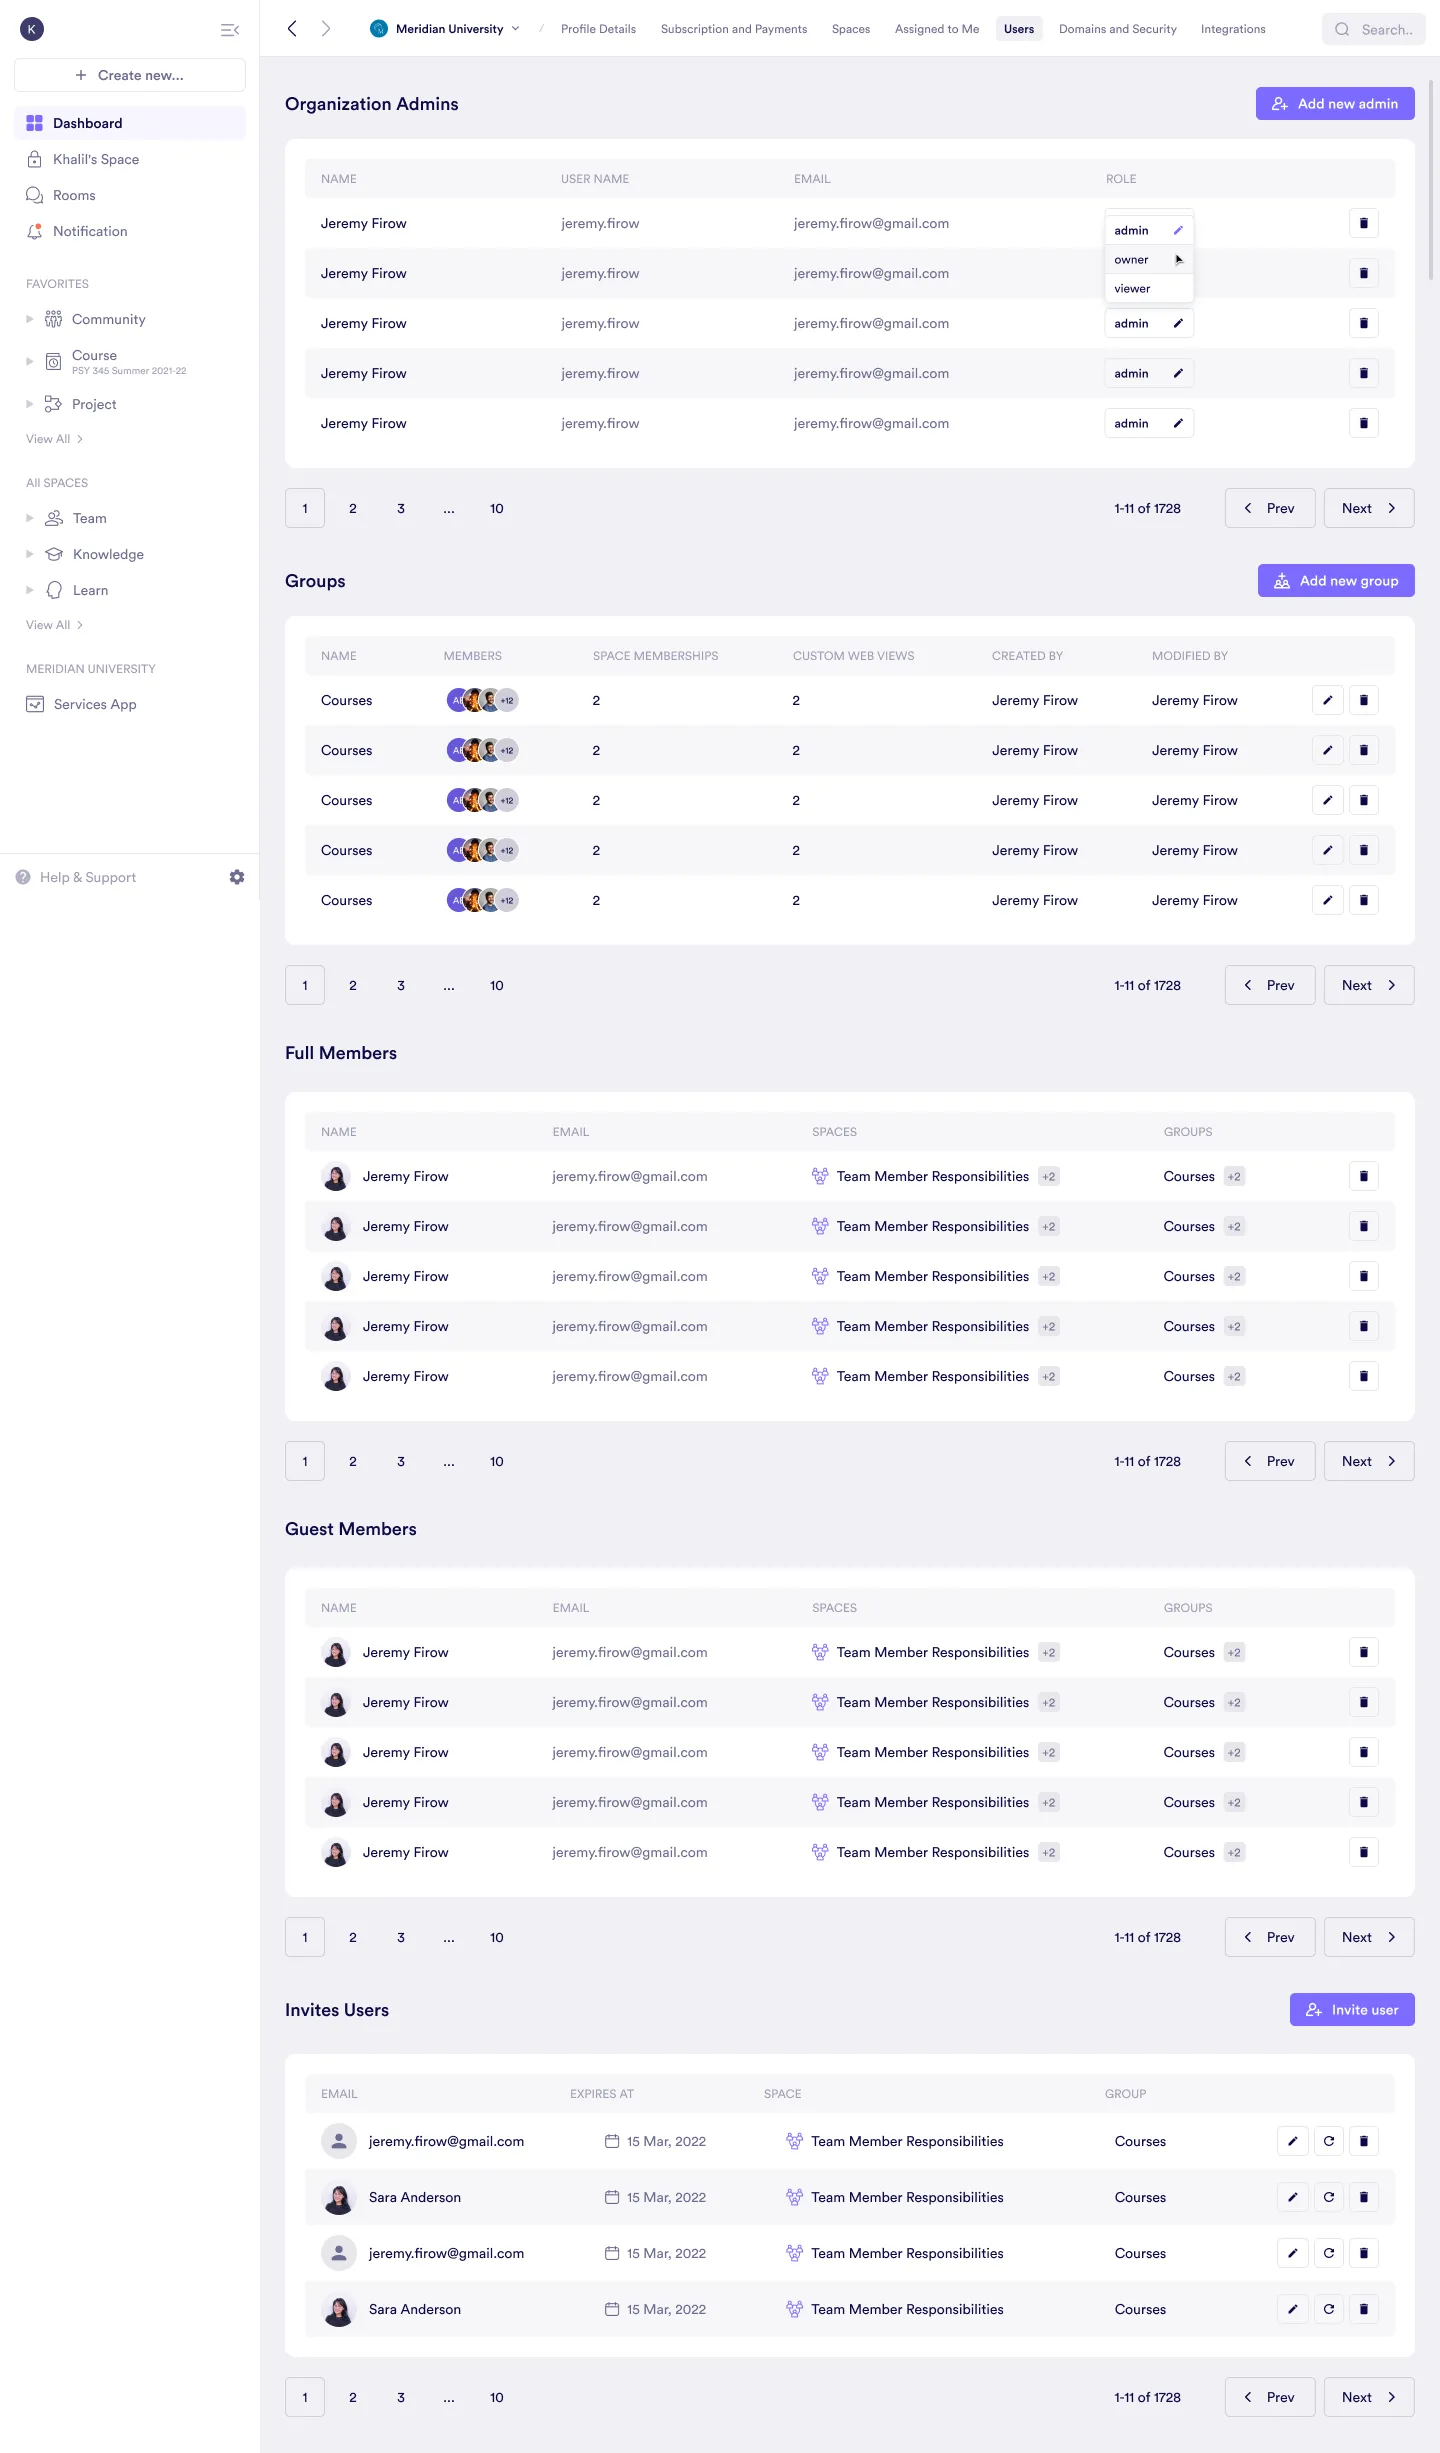
Adding a New Group
Click Add new group
Click Add new group.

Enter group details
Add a group name and click Next.
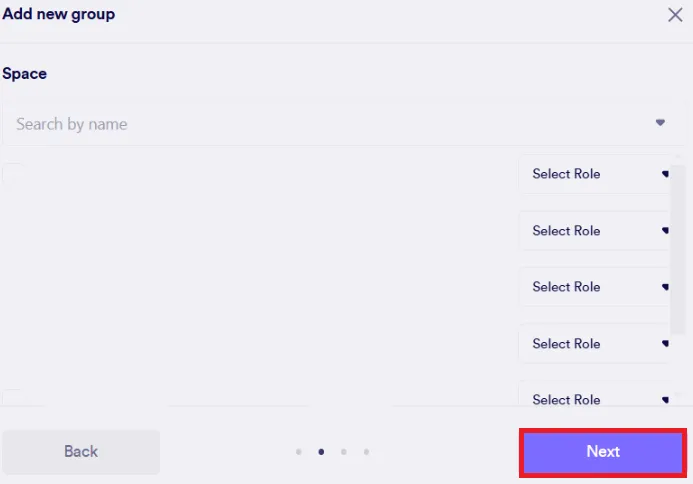
Choose space and define roles
Choose the space where the group will reside, define their role within the organization, and click Next.
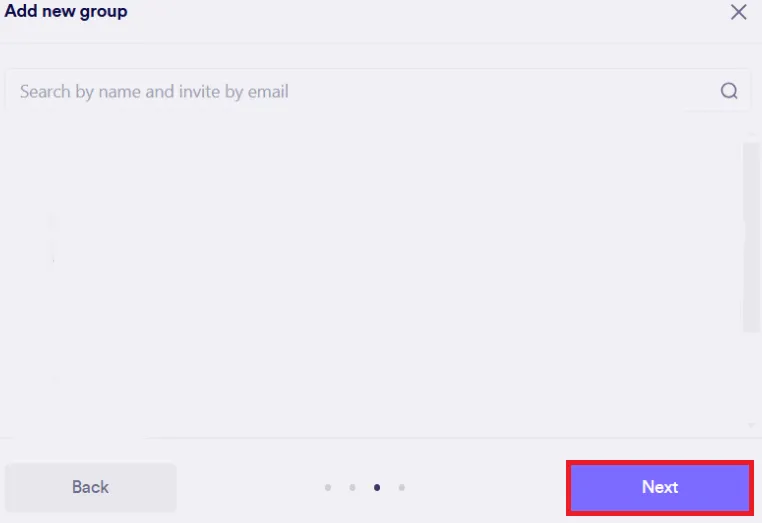
Select group members
Select the corresponding people from the group and click Next.
Define views and create group
Define custom web views and click Create group.
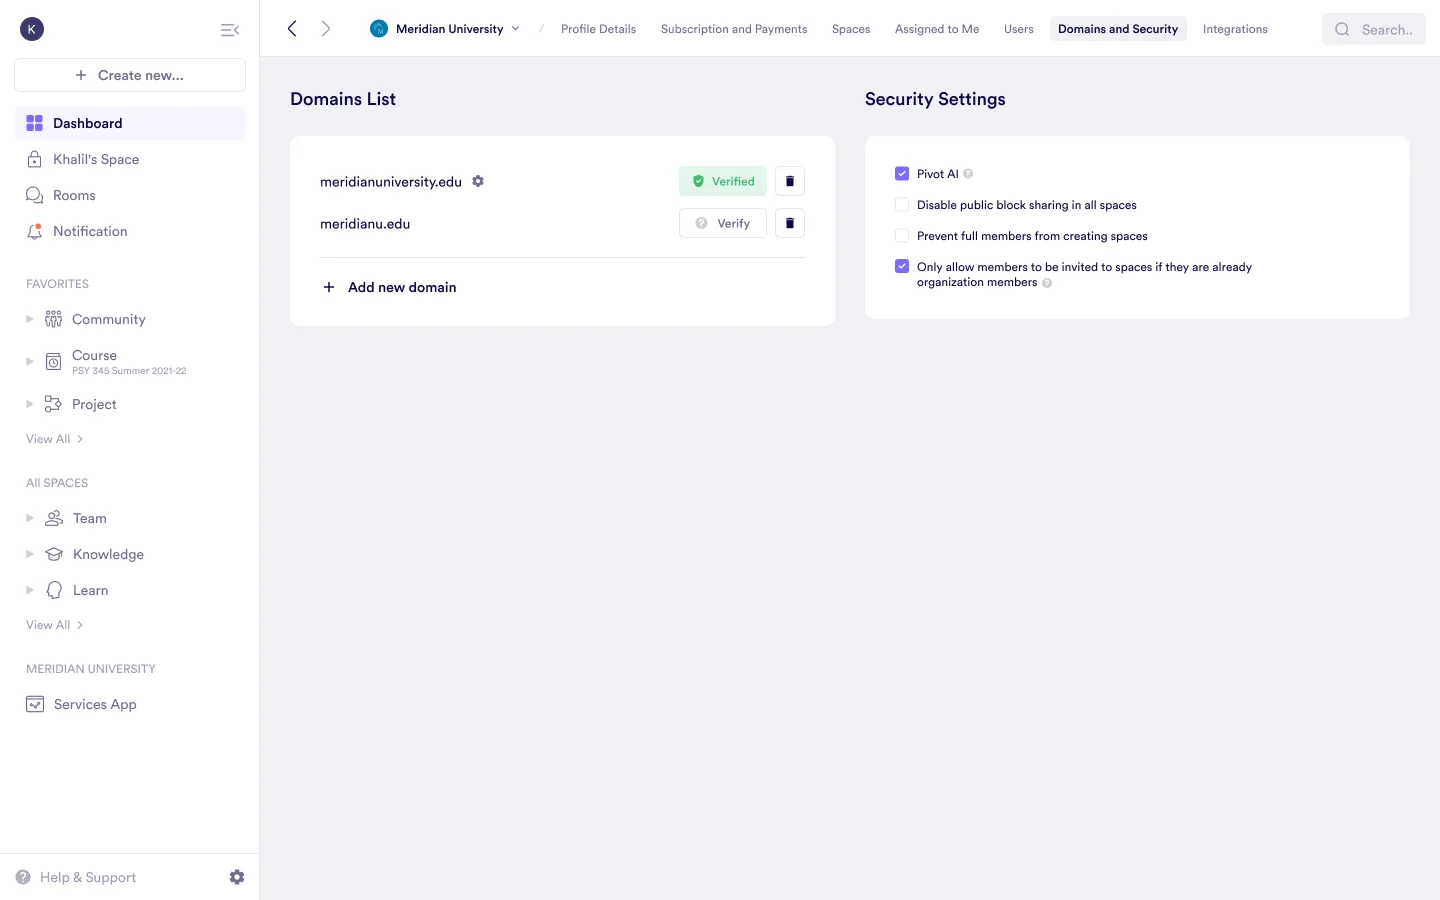
Domains and Security
Admins can configure security settings and manage domains.
Available security settings:
- Pivot AI – Enable or disable AI-powered features.
- Disable public block sharing across all spaces.
- Restrict space creation – Prevent full members from creating spaces.
- Limit space invitations – Only allow invitations for existing organization members.
- Control verified domain accounts – Enforce full account control for members with verified organization email addresses. See Controlling Verified Domain Accounts for details.
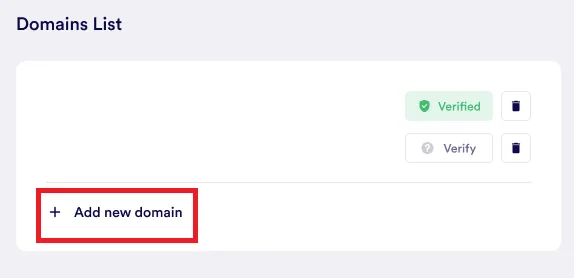
Adding a Domain
Go to Domains and Security
From the Domains and Security page, click Add new domain.
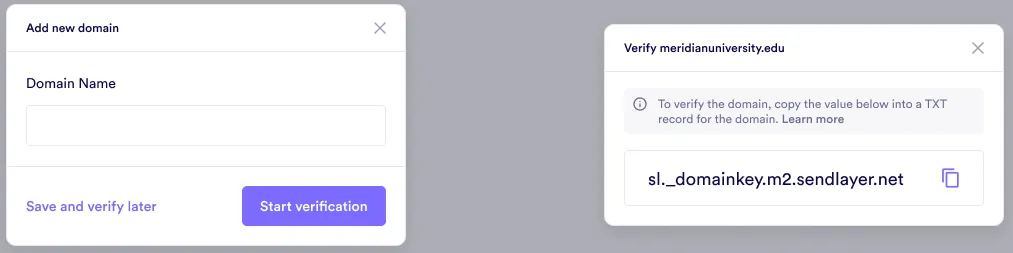
Enter domain details
Enter the domain name and click Start verification or Save and verify later.
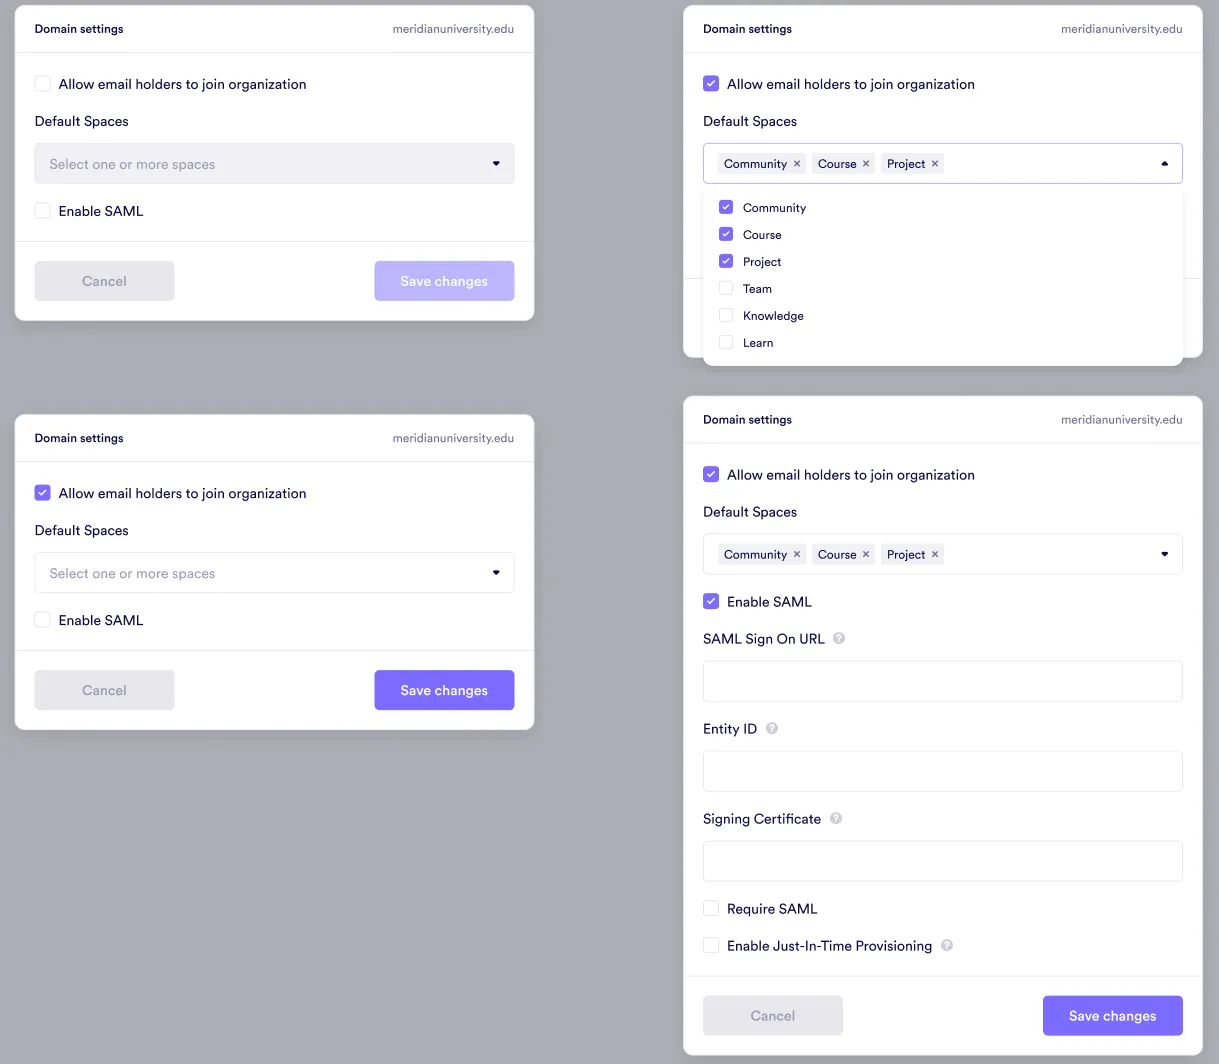
Save domain settings
Edit domain settings and click Save changes.
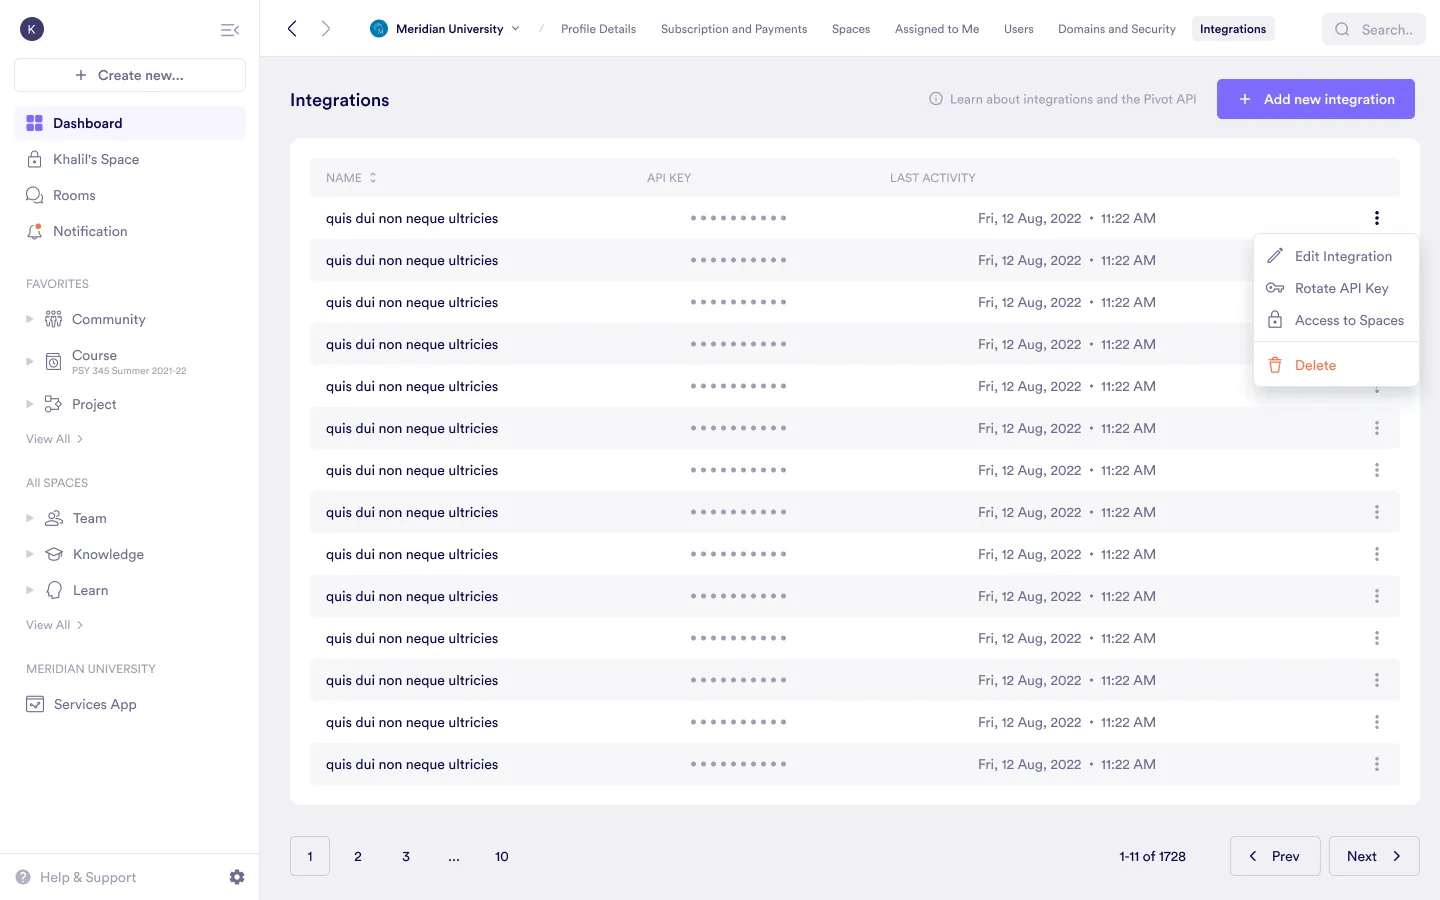
Integrations
Admins can add, configure, and manage integrations within the organization. This includes:
- Adding new integrations to connect with external services.
- Managing API keys and authentication settings.
- Monitoring integration activity and usage.
This ensures that external connections align with the organization’s security and collaboration needs.
Was this guide helpful?