Managing Members and Roles
Learn how to manage members, groups, roles, access requests, invites, space duplication, and how to find and organize spaces in Pivot.
This guide covers how to manage members, access, and structure within a space in Pivot. You’ll learn how to add and organize members, create groups and custom roles, handle access requests and invites, duplicate spaces for reuse, and find and organize spaces using search, sort, and filters. These tools help keep spaces organized as teams grow, access changes, and work evolves over time.
Managing Space Members
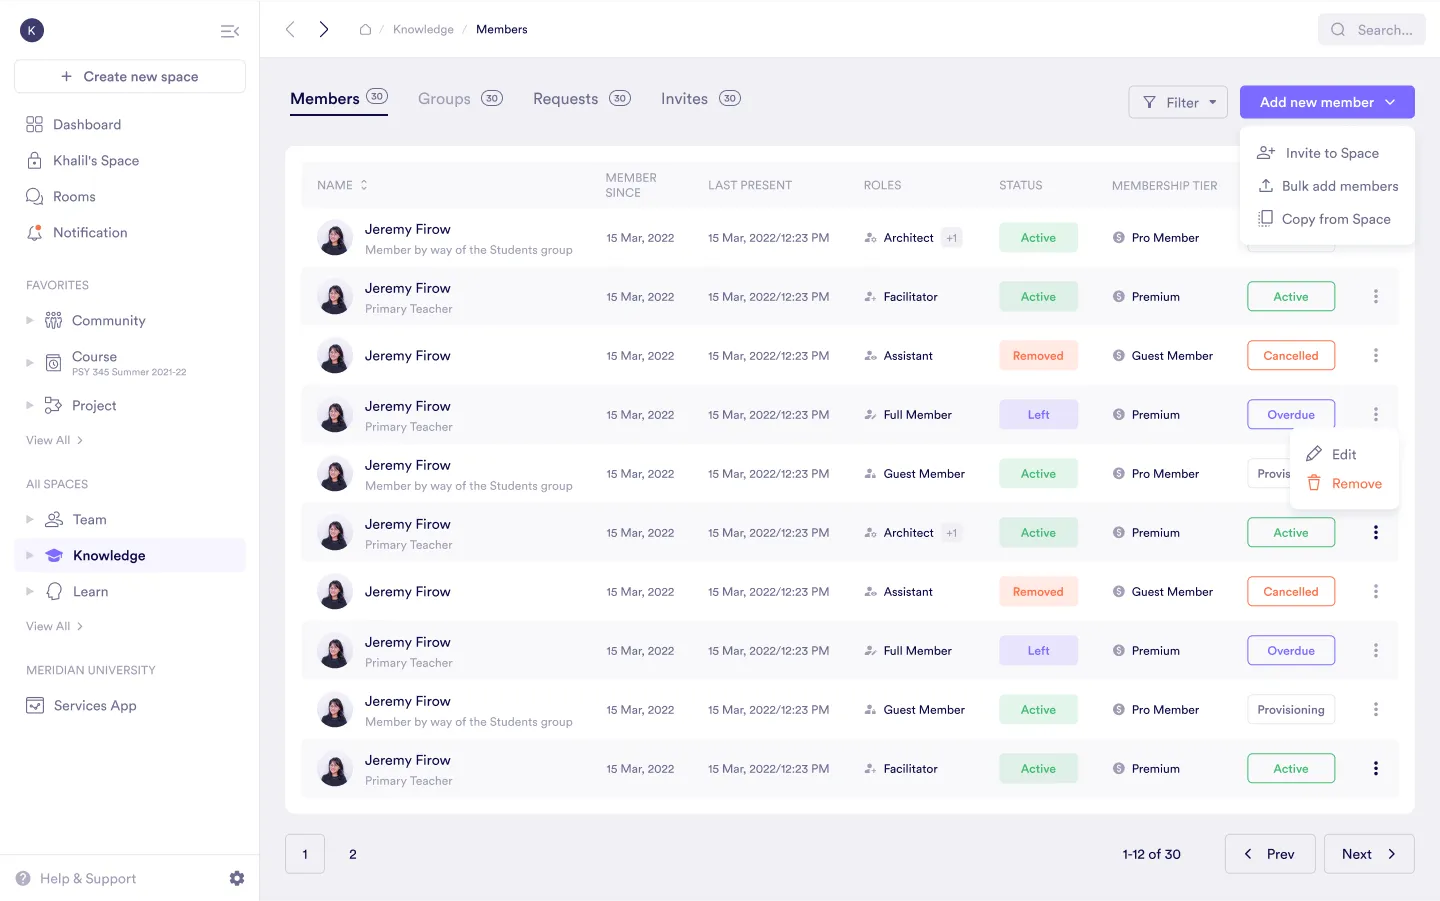
In the Members tab of the space settings, you can view, manage, and organize members based on roles, status, and membership tiers.
- Add new members: Invite users and manage their access.
- Assign roles: Define permissions based on team needs.
- Remove members: Manage team structure effectively.
Managing Groups in Spaces
The Groups tab provides a structured way to organize members into teams. Each group includes: - Group name: The designated name for the group (e.g., Courses). - Roles: Assigned permissions within the group. - Member since: Date members joined the group. - Members: Visual representation of members through avatars.
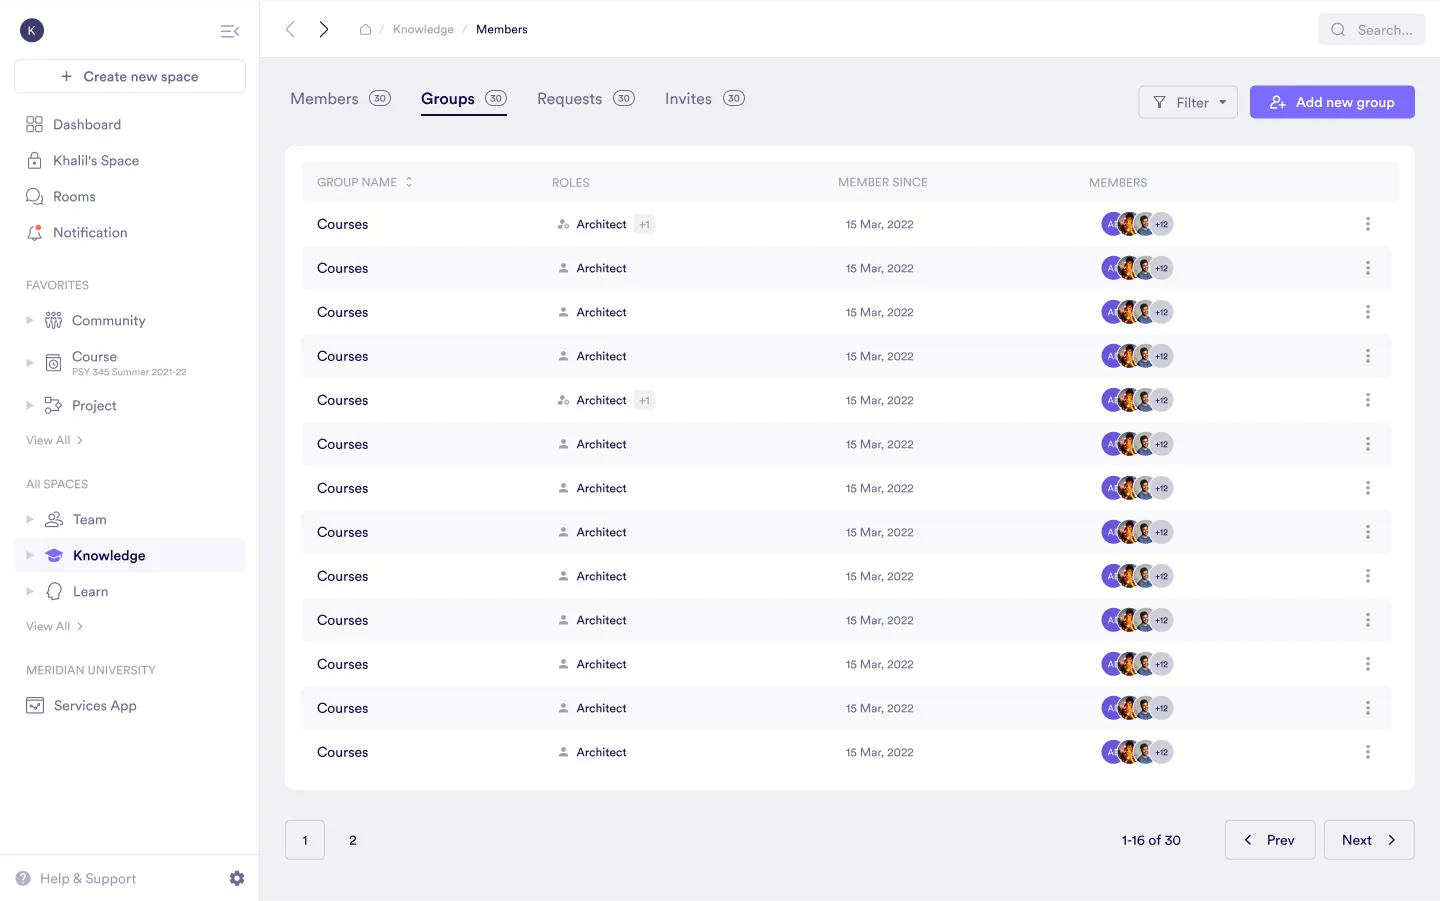
Create a new group
Click the Add new group button to create and manage groups within the space.

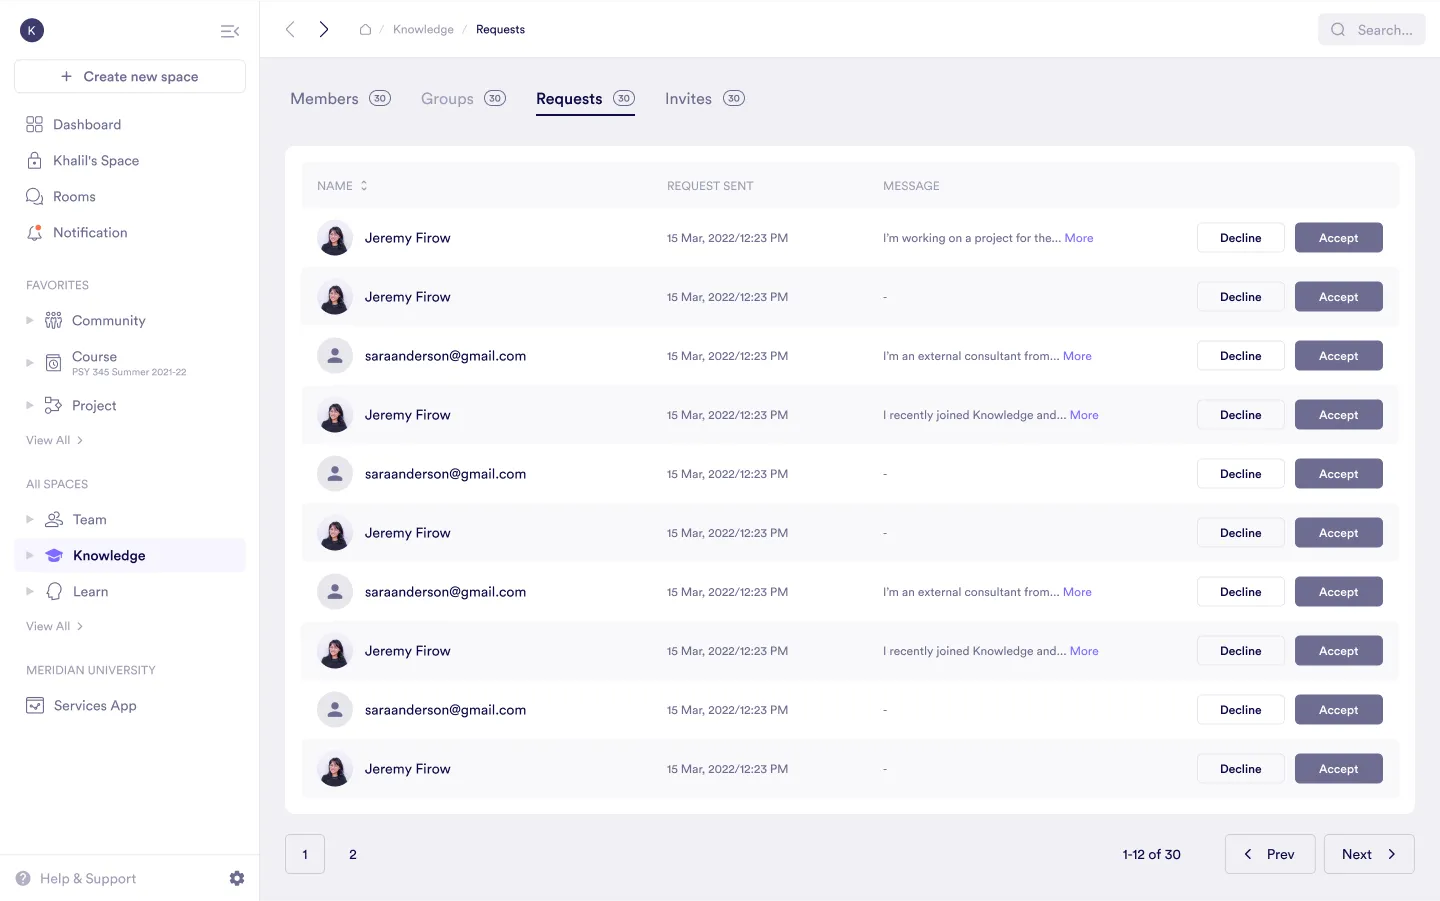
Managing Space Access Requests
The Requests tab allows space admins to review and manage incoming access requests. Each request includes: - Name: The requester’s name or email address. - Request Sent: The date and time of submission. - Message: Optional message provided by the requester. Admin actions:
- Accept: Grant access. - Decline: Deny access.
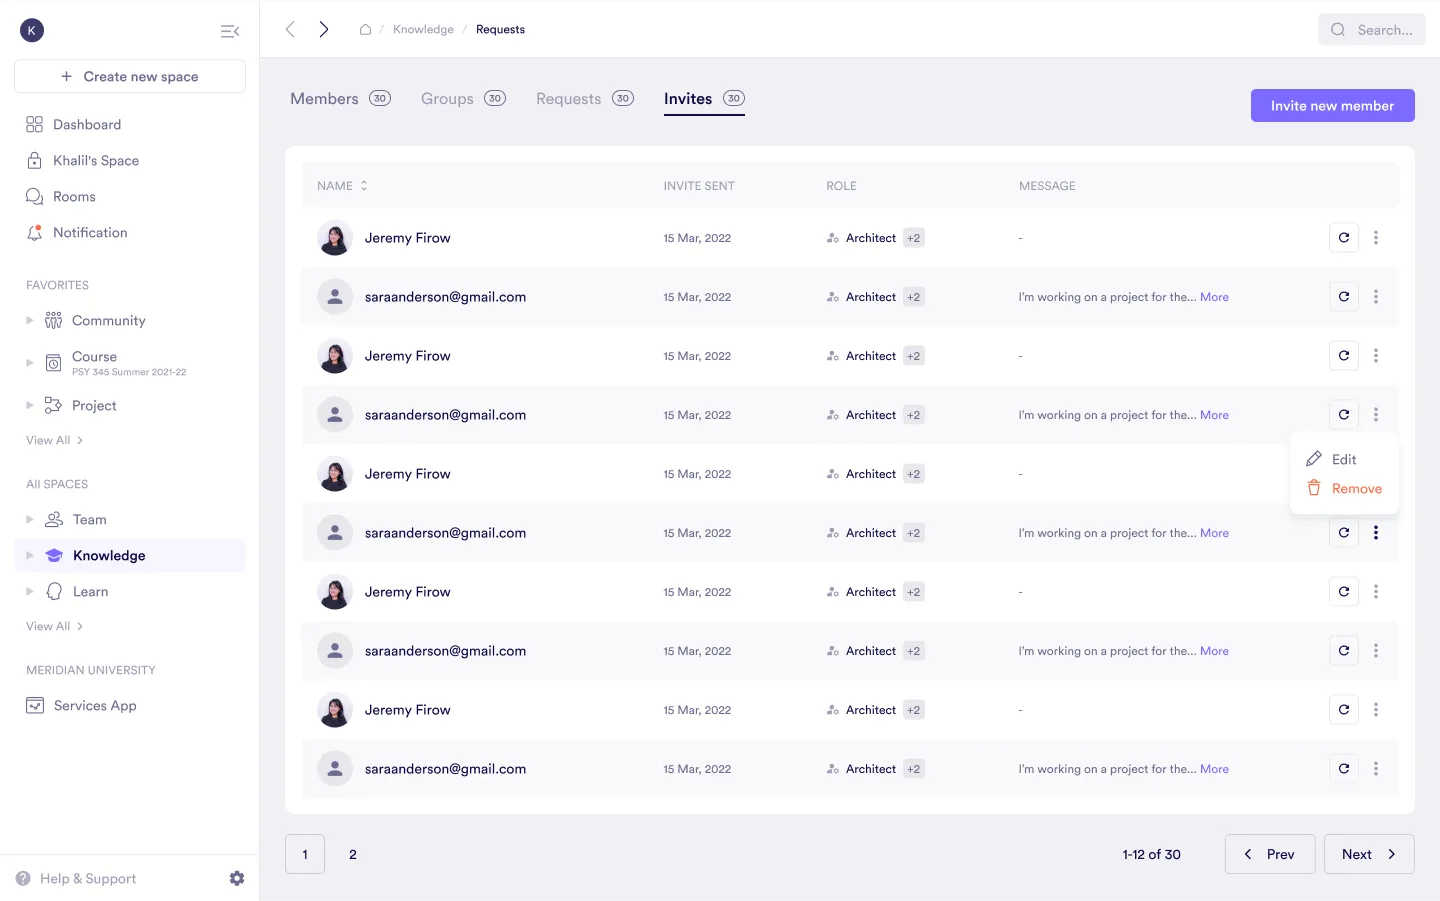
Managing Invites
The Invites tab in space settings displays pending invitations. Each row shows:
- Name: The invited member’s name or email.
- Invite sent: The date the invite was issued.
- Role: The role assigned upon joining.
- Message: Any custom invite message.
Admin actions:
- Resend invites: Click the refresh icon.
- Edit or remove invites: Click the three dots next to a pending invite.
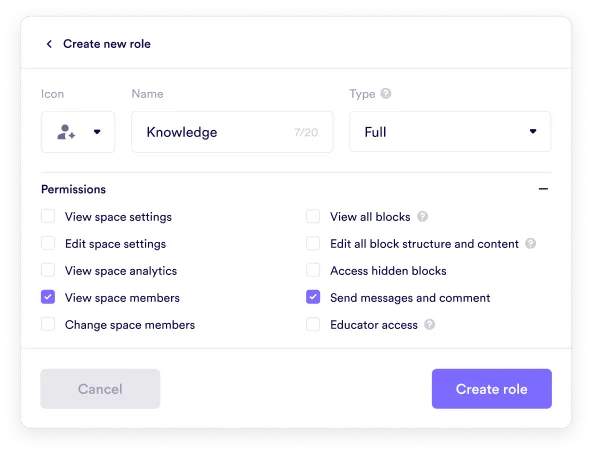
Creating a Space Role
Open **Create new role**
The Create new role window allows you to define specific permissions for space members.
Space Duplication
Create a copy of an existing space—structure, pages, and blocks—so you can reuse a setup for a new project, client, or course without rebuilding from scratch.
Only space members with editing access and organization super admins can duplicate a space. Members are not copied to the new space. The user who runs the duplication becomes the architect of the new space.
Duplicating a space
Open the **⋯** menu in the source space
Go to the space you want to copy and click the ⋯ menu (top right).
Select **Duplicate**
Name the new space
Locate the copied space
The duplicated space appears in your Spaces list and is ready to edit.
Finding and Organizing Spaces
Quickly locate and manage spaces from the My spaces page. You can search by name, sort by recent or early activity, and filter by label or space type. All controls can be combined.
Search
Use the search bar at the top to find a space by name.
- Live results: Matches update as you type.
- Clear search: Remove the query to return to the full list.
Sort
Change the list order to surface what you need first.
- Latest activity: Most recently active spaces first.
- Oldest activity: Least recently active spaces first.
Filter
Narrow the list to specific categories.
- By label: Select Label and type to find and choose one or more labels.
- By space type: Select Space type and choose one or more types (Community, Course, Project, Team, Knowledge, Other).
- Combine & reset: Use multiple filters with search and sort; clear filters from the same menu to return to the full list.
Was this guide helpful?