Setting Up a Domain
Learn how organization owners add a domain to Pivot, publish the required DNS TXT record, and wait for verification.
Setting Up a Domain
Adding a domain proves that your organization controls an email domain, such as example.com. After the domain is verified, Pivot can use it for organization-wide domain settings.
Before You Start
You need:
- Access to Pivot as the organization owner.
- Access to the DNS settings for the domain.
- The plain domain name, such as
example.com. Do not includehttps://, paths, or email addresses.
Add the Domain in Pivot
Open Organization admin
From the sidebar, click your profile picture, choose Organization admin, then select the organization.
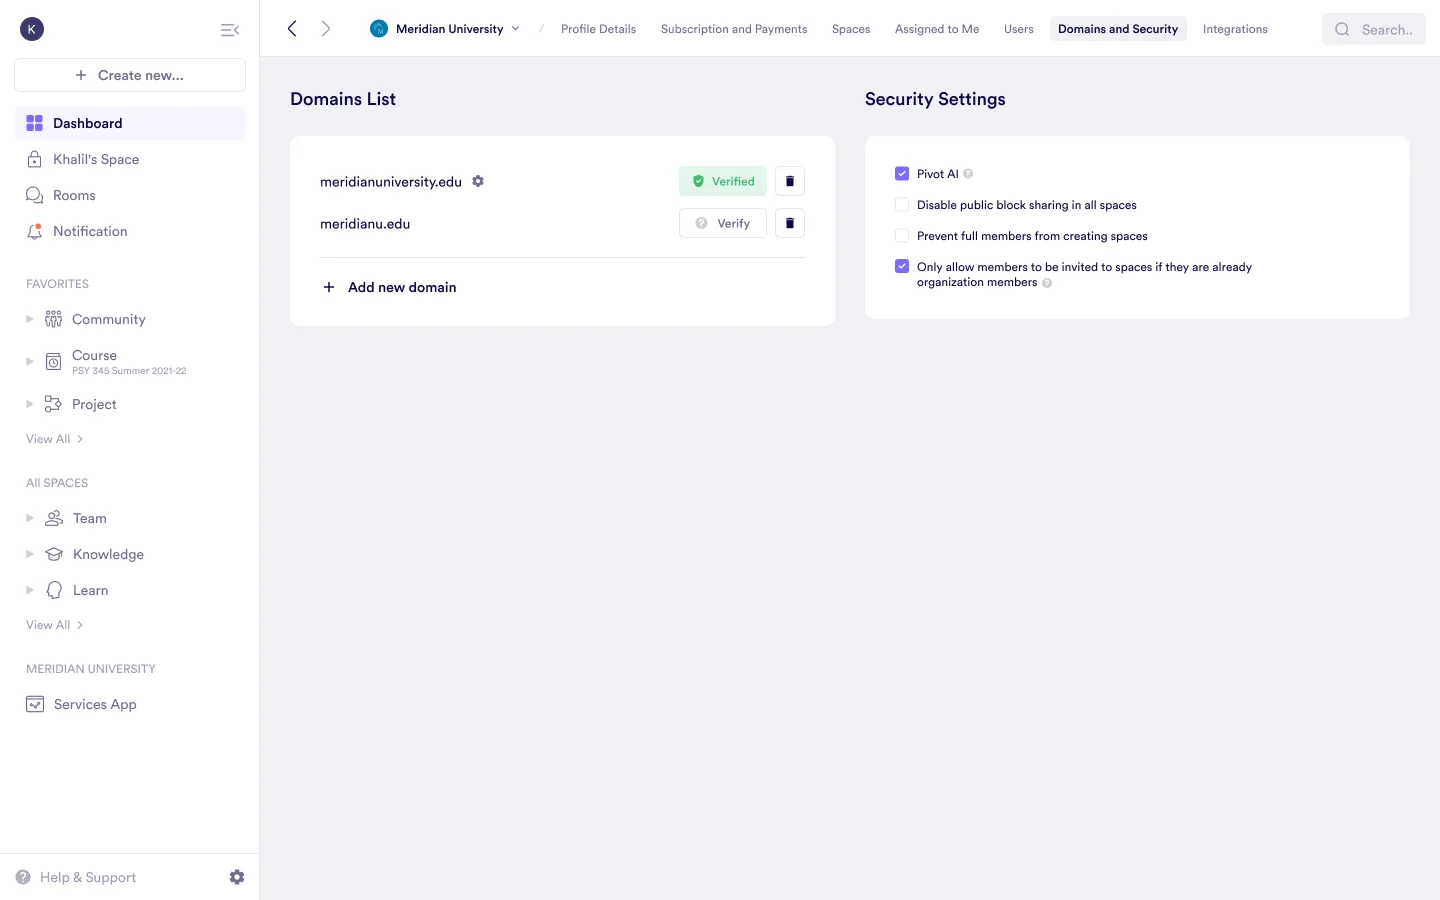
Open Domains and Security
Select Domains and Security.
Add the domain
Click Add new domain, enter the domain name, then choose Start verification.
Copy the TXT value
Pivot shows a verification value that starts with pivot-verification= and ends with .pivot.app. Copy the full value.

Add the DNS TXT Record
In your DNS provider, create a TXT record for the domain you added in Pivot.
| Field | Value |
|---|---|
| Type | TXT |
| Name/Host | The root domain, often @, or the exact subdomain you added |
| Value | The full pivot-verification=...pivot.app value from Pivot |
| TTL | Your provider’s default TTL is fine |
Save the record. Some DNS providers add quotation marks automatically around TXT values. That is fine; do not add extra spaces or change the value.
Wait for Verification
Pivot checks DNS automatically after the domain is created. The first check runs after about 30 seconds. If the record is not visible yet, Pivot keeps checking with a longer delay, up to about 15 minutes between checks.
When the TXT record is found, the domain status changes from Verify to Verified in Domains and Security.
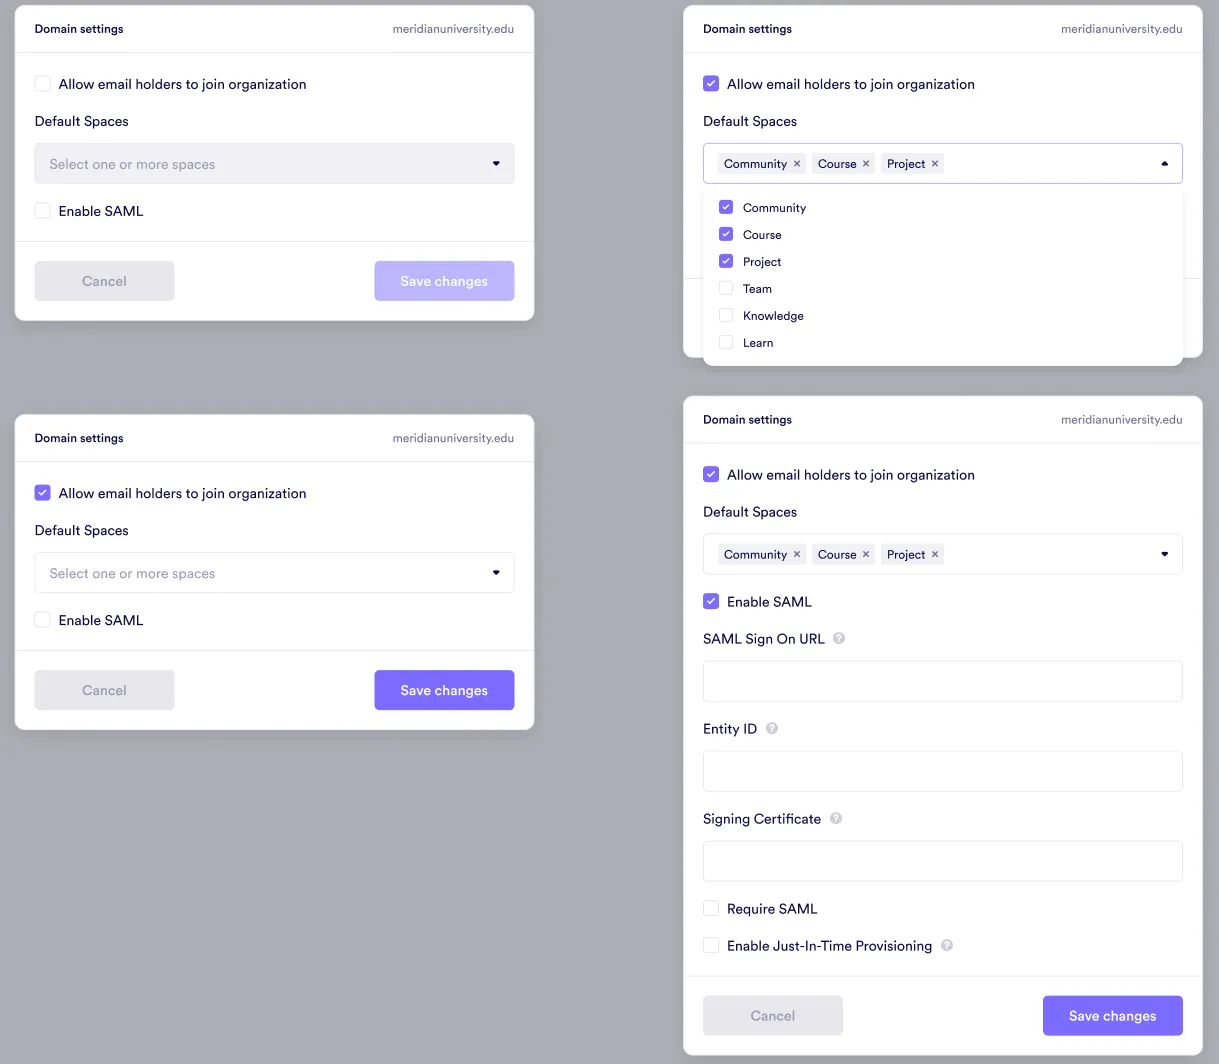
Configure Domain Settings
After the domain is verified, open its settings to choose whether email holders can join the organization, select default spaces, or configure SAML.
Troubleshooting
- Confirm the TXT value exactly matches the value shown in Pivot.
- Confirm the record is on the same domain or subdomain you added in Pivot.
- Wait for DNS propagation if you just created or changed the record.
- If the domain is already verified by another Pivot organization, contact Pivot support before trying again.
Was this guide helpful?